![]()
![]()
![]()
This hour is a little different from the other hours. Instead of studying a single central aspect of Windows 95, such as Explorer, this hour contains a potpourri of desktop management tips and procedures that improve the way you use the Windows 95 environment. Whereas the previous hours have studied topics in depth, this hour offers advice that you may want to use while you work within Windows 95.
One area this hour explores is screen savers. Windows 95 comes with several screen saver designs and you can purchase and download additional screen savers. Screen savers not only provide something for your computer to do while it is idle, but they offer security features as well.
This hour also offers a collection of tips that simply help make your use of Windows 95 even easier than it would otherwise be. For example, you learned how to modify the Start menu in Hour 6, "Explore the Windows 95 System," through the important Settings menu on the Start menu. In addition to going through the Settings menu, you also can use the mouse to drag programs to the Start menu without displaying a single menu!
Start Windows 95 and walk through this hour, trying the shortcuts and advice, and decide which topics suit your needs best. Now that you've mastered the major Windows 95 tools such as Explorer and the Settings menu, you are ready to streamline the way that you use Windows 95.
The highlights of this hour include:
Want to know an insider's computer industry secret? Here it is: Screen savers really don't save many screens these days. In the past, computer monitors, especially the monochrome green-letters-on-black kind, would burn in characters when left on too long without being used. In other words, if you left the monitor on for a long time and did not type anything, the characters on the monitor would begin to leave character trails that stayed on the monitor even after you turned it off.
To combat character burn-in, programmers began to write screen savers that blanked the screen or displayed moving characters and pictures. The blank screens had no burn-in problems, and the moving text never stayed in one place long enough to burn into the monitor. The screen savers would kick into effect after a predetermined length of non-use. Therefore, if you walked away from your computer, the screen saver would begin after a few minutes. Upon returning, you could press any key to restore the computer screen to its original state where you left it.
Almost everybody has heard of screen savers these days. Computer software stores contain shelf after shelf of screen saver programs. There are screen savers that display pictures of your favorite television characters. There are screen savers with cartoons. There are screen savers that continuously draw geometric and 3D designs. Microsoft designed Windows 95 to include several screen savers also. Therefore, you don't have to buy a screen saver because if you have Windows 95, you already have an assortment of them to choose from.
Getting back to that industry secret: Today's monitors don't have the burn-in problem that previous monitors had. Screen savers aren't needed. Why, during an age when they are not needed, are screen savers more popular than ever before? The answer is simple: Screen savers are fun! Screen savers greet you with designs and animated cartoons when you'd otherwise look at a boring screen. It's cool to use a screen saver.
TIME SAVER: If you think that you might want to try one of the store-bought screen savers, first try one from Windows 95 to see if you like screen savers. Some people decide they don't like them once they begin using screen savers.
CAUTION: Screen savers aren't just for fun and games so don't rule them out before you've looked at them! Even though you may not care for screen savers (as I just mentioned, not everybody likes them), the Windows 95 screen savers offer an added benefit not found in many other screen savers: The Windows 95 screen saver provides password protection. If you need to walk away from your screen for a while but you want to leave your computer running, you can select a password for the screen saver. Once the screen saver begins, a user has to enter the correct password to use your computer. This ensures that payroll and other departments can safely leave their computers, without fear that somebody will see confidential information.
Task 8.1: Setting Up a Screen Saver
Step 1: Description
Windows 95 contains several screen savers from which you can choose. Through the
Screen Saver dialog box you can set up a blanking screen saver or one that moves
text and graphics on the screen. You control the length of time the monitor is idle
before the screen saver begins.
Step 2: Action
JUST A MINUTE: If you are working in Windows 95 now, using a word processor or other program, you may not see the wallpaper. Minimize your current window so that you can see the wallpaper and right-click over the wallpaper.
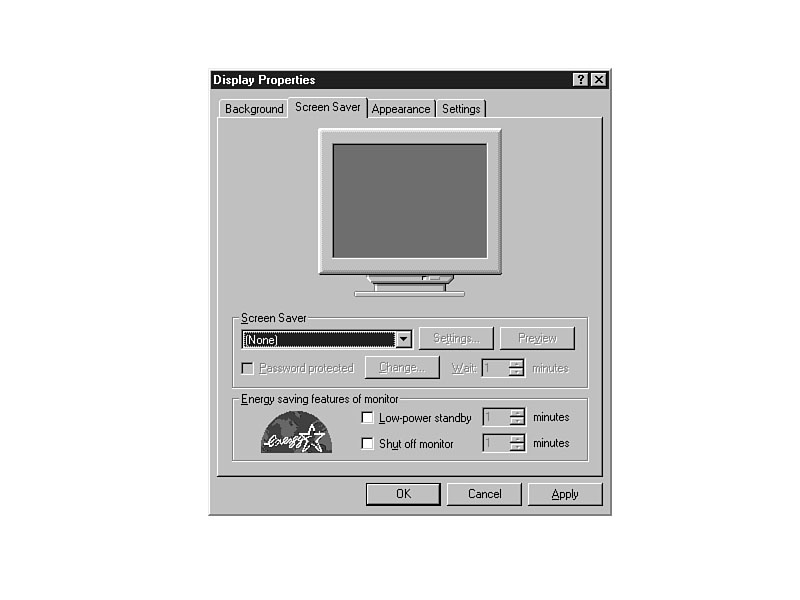
Figure 8.1.
The Properties command displays the Display Properties tabbed dialog box.
JUST A MINUTE: The Display Properties tabbed dialog box is the same dialog box you selected in Hour 2 to change your Windows 95 wallpaper. Therefore, if you don't currently use wallpaper (see the blank desktop background on Figure 8.1), your screen may differ slightly from the one in Figure 8.1.
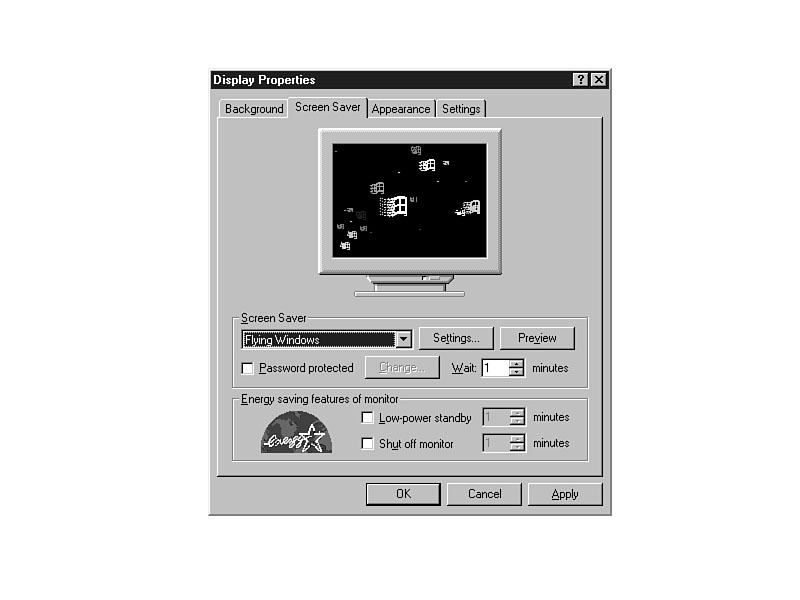
Figure 8.2.
The Screen Saver dialog box controls the screen saver's timing and selection.
Figure 8.3.
You may preview any of the screen savers.
JUST A MINUTE: Task 8.2 explains how to use the password option with the screen saver.
Step 3: Review
Screen savers are easy to set. A right mouse-click on your desktop and selecting
Properties from the resulting menu will activate the Display Properties tabbed dialog
box where you can launch a screen saver. Not only can you control which screen saver
is used, but you also can control the number of idle minutes the screen saver requires
before activating. You can control the speed of animated screen savers as well.
TIME SAVER: If you don't want a screen saver, select (None) in the screen saver's dialog box.
Task 8.2: Securing Your Screen Saver
Step 1: Description
Using the Display Properties box, you can add a password to any of the Windows 95
screen savers including the blank screen saver. Once the screen saver executes, it
requires a password before relinquishing control to you or anyone else who wants
to use your computer.
Step 2: Action
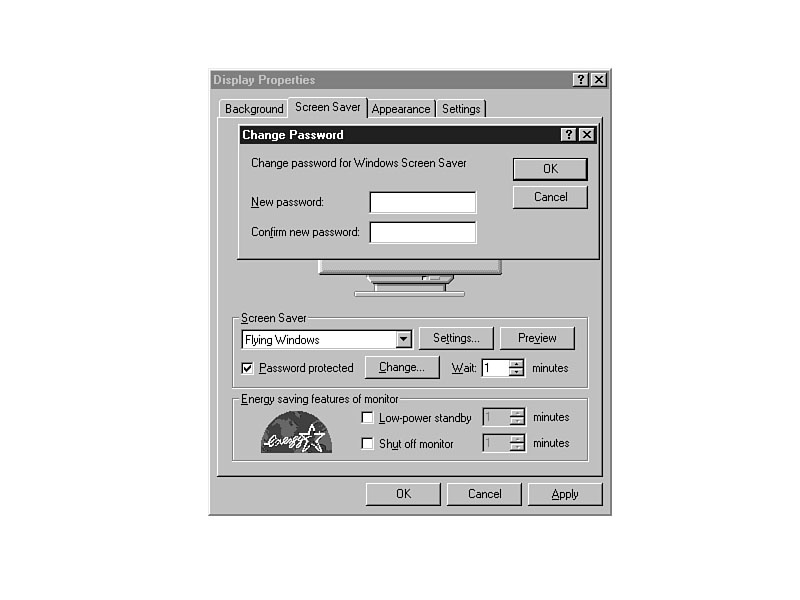
Figure 8.4.
Tell Windows 95 the secret screen saver password.
CAUTION: The screen-saver password does not guarantee total computer security. Someone can reboot your computer and use the computer's files. The password-protected screen saver does, however, keep people from looking at the work you were performing before you left the computer idle.
Step 3: Review
The password lets you protect your computer's screen from view by others. By setting
a password, you ensure that people cannot stop the screen saver to look at what you
were doing with the computer before the screen saver took effect.
A clock showing the current time appears at the right of your taskbar. (The clock's position may differ depending on where you moved your taskbar.) In addition to the time, your computer and Windows 95 also keeps track of the date.
There are several reasons why you may want to change the computer's time and date settings. Perhaps you've moved to a different part of the world and need to change the computer's clock. Perhaps your computer contains a time and date memory kept current with a battery that has gone bad. Perhaps the person who set up your computer simply didn't know the right time or date when he or she installed Windows 95. Whatever the reason for setting the time and date, you'll see here that these settings are simple to adjust.
JUST A MINUTE: Windows 95 uses the international settings, found by double-clicking the Regional Settings icon in the Control Panel, to format all date and time values displayed from within Windows 95. Therefore, the selected country in the Windows 95 international settings determines the appearance of all time and date values.
As you saw in Hour 2, "Tour Windows 95 Now," the Control Panel contains
many of your system's hardware and software settings. You can change your computer's
date and time settings by double-clicking the Date/Time icon inside the Control Panel.
There's a better way, though, a much faster and easier way, as Task 8.3 describes.
Task 8.3: Changing the Time and Date with the Mouse
Step 1: Description
The taskbar itself gives you access to the time and date settings of your computer.
You can double-click on the taskbar clock to display the time and date modification
dialog box.
JUST A MINUTE: If you don't see the time on your taskbar, select the Settings | Taskbar command on the Start menu and check the Show Clock option.
Step 2: Action
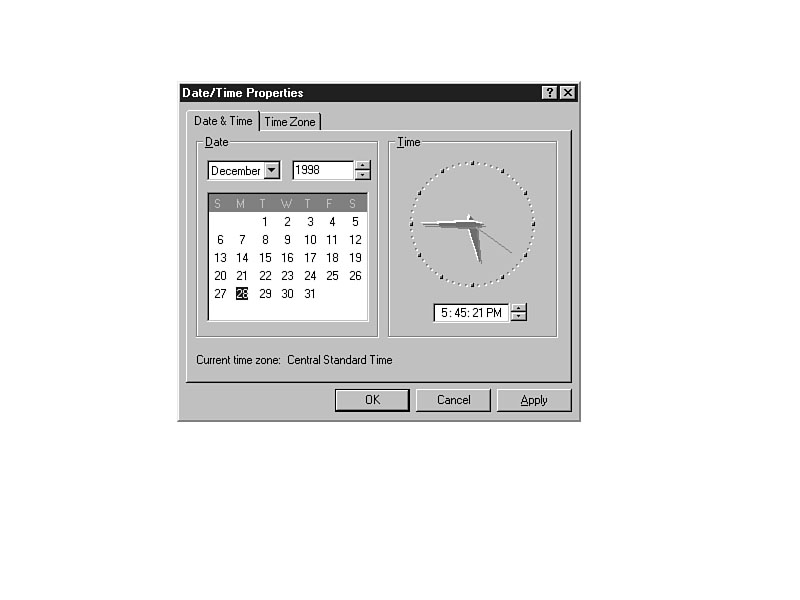
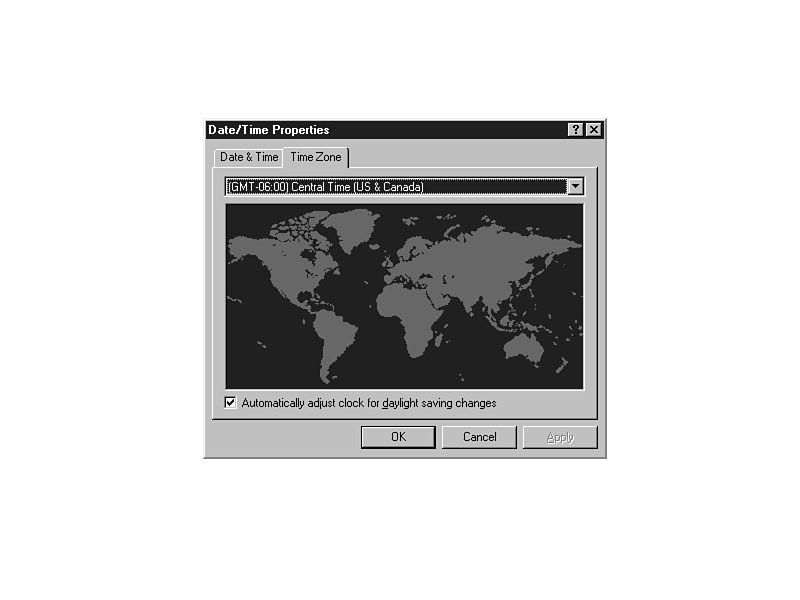
Figure 8.5.
A double-click displays this Date/Time Properties dialog box.
Figure 8.6.
Change the time zone visually or using a dropdown listbox.
TIME SAVER: Not all time zones respect daylight saving time. For example, if you live in Indiana, you don't have to change your clocks every six months because you don't follow daylight saving time. For those who don't want Windows 95 to adjust for daylight saving, uncheck the option at the bottom of the screen.
Step 3: Review
Changing the date and time requires double-clicking over the time on your taskbar.
The tabbed dialog box that appears lets you change the time, the date, and the time
zone. If you want Windows 95 to update the clock every daylight saving time period,
you can check an option to have Windows 95 do just that.
JUST A MINUTE: If your computer adjusts the clock due to daylight savings time, Windows 95 lets you know about the change with a dialog box the first time you use Windows 95 after the change.
Over time, you could place many icons on your desktop. A clean desktop keeps the clutter down, so you don't want to place too many items on the desktop at any one time. You might, however, using the copy and paste tools discussed so far in this book, want to put your most popular programs out on the desktop (created as a shortcut) so the programs are always there when you want to double-click their icons.
TIME SAVER: As you learned in Hour 6, "Explore the Windows 95 System," you can place your most commonly used programs on the desktop by copying the icons and creating a shortcut to the icon programs. If you do this, you then don't have to display the Start menu and click through a series of cascaded menus when you want to execute that program.
Once you place a lot of icons on the desktop, you may get a cluttered screen,
such as the one shown in Figure 8.7. Windows 95 supplies tools that can help align
those icons better and make your desktop look a little more professional, as Task
8.4 explains.
Figure 8.7.
Numerous icons can clutter the Windows 95 desktop.
Task 8.4: Arranging Your Desktop Icons
Step 1: Description
Your desktop can get cluttered. When it does, use the right mouse button's desktop
menu to put order back in your icons.
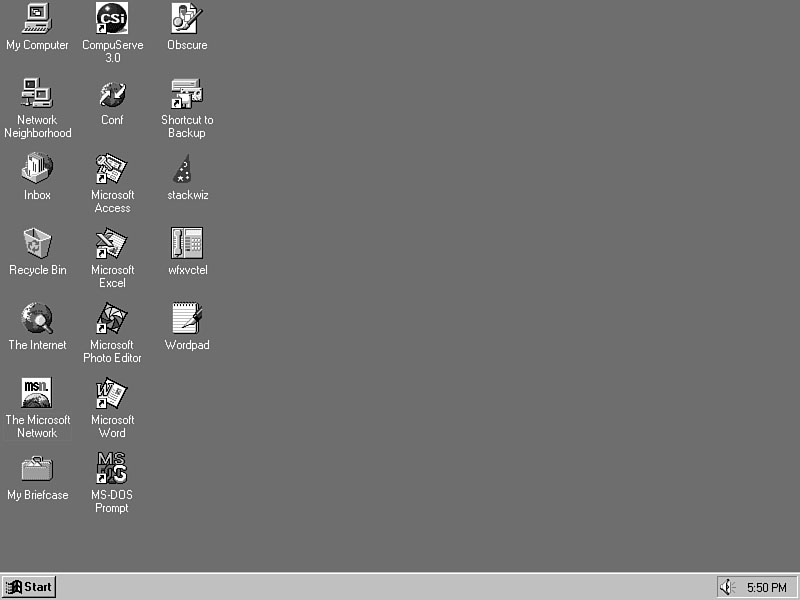
Step 2: Action
Figure 8.8.
The icons almost appear in alphabetical order.
TIME SAVER: The Auto Arrange option keeps you from having to adjust icons manually, putting them in aligned order every time you add a new icon to the desktop or remove an icon from the desktop.
JUST A MINUTE: The Auto Arrange option, when checked, always overrides any attempt to order icons in groups using Line up Icons.
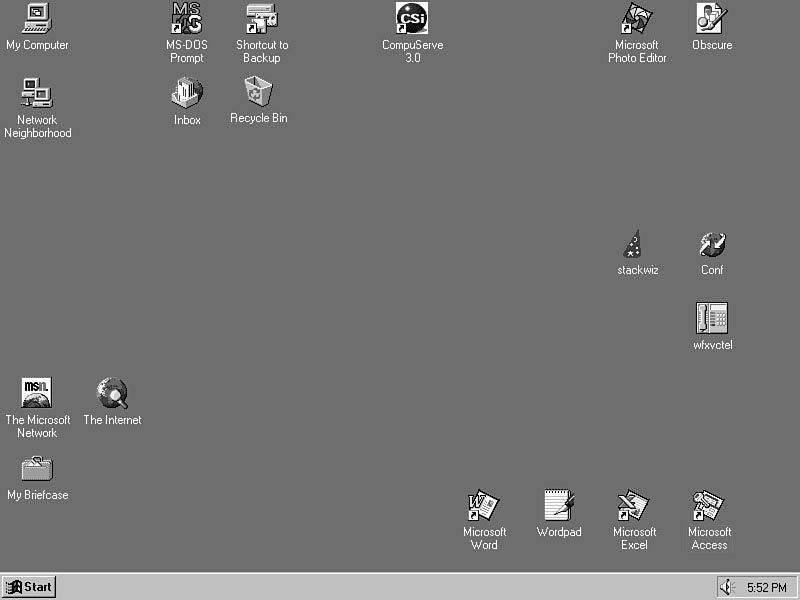
Figure 8.9.
Use the Line up Icons command to create organized groups of icons.
Step 3: Review
By right-clicking over your desktop you can use the Windows 95 tools to place your
icons in an organized order. You can organize the icons and keep them organized if
you want to leave the work up to Windows 95; the Auto Arrange option ensures
that icons go into a table of rows and columns as soon as you add an icon. If you
delete an icon from the desktop, the others rearrange automatically also. If you
want more control, you can turn off the Auto Arrange option and use the Line
up Icons command to organize your icons into related groups on the desktop.
TIME SAVER: Remember that you can delete an icon from the desktop by right-clicking over that icon and selecting the Delete command. If you select more than one icon (by holding Ctrl while clicking the left mouse button) before clicking the right mouse button over one of the selected icons, Windows 95 deletes all of the selected icons in one action.
Want to add programs to the Start menu quickly? Hour 6 taught you how to access the powerful Settings | Taskbar dialog boxes with which you can modify the way the taskbar behaves. The Settings | Taskbar dialog boxes include several options that let you rearrange the Start menu and add or remove programs to and from the Start menu.
If all you want to do is add programs, such as the calculator program, to the
Start menu, you don't need the Settings | Taskbar dialog boxes, as
Task 8.5 explains.
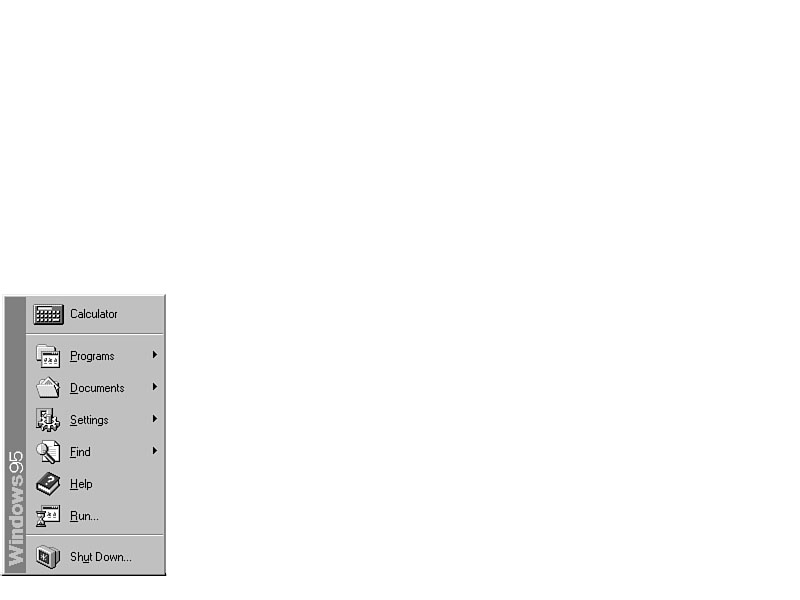
Task 8.5: Quickly Adding Programs to the Start Menu
Step 1: Description
After starting Explorer, opening the My Computer icon, or displaying a Windows 95
Open dialog box, drag the program's icon to the Start button. Windows 95 instantly
adds that program to the Start menu. Earlier you saw how to add the Windows 95 Calculator
program to the Start menu. This task offers you a faster way to add programs by showing
you how to drop the calculator program onto the Start button.
Step 2: Action
JUST A MINUTE: If you've turned on the display of filename extensions, the full name of the Calculator program is Calc.exe.
Figure 8.10.
The calculator program is now part of the Start menu.
Step 3: Review
From an Open dialog box, the Explorer screen, or the My Computer icon, you can add
programs to the Start menu with a simple mouse drag. Don't add too many programs
to the Start menu, though, or you'll clutter the Start menu too much. Keep only your
special and frequently used programs on the Start menu.
CAUTION: Unfortunately, Windows 95 offers no short way to remove programs from the Start menu. You'll have to return to Hour 6's chapter and remove the program from the Start menu within the Settings dialog box explained there.
Windows 95 offers several color schemes for you to select. Microsoft designed several color schemes that work well together. Depending on your taste, you can choose from conservative to very wild colors.
The color schemes that you can select have nothing to do with the colors of icons,
wallpaper, or screen savers on your system. The color schemes determine the color
for various system-wide items such as screen title bars, window backgrounds, and
dialog box controls.
Task 8.6: Changing the Color Scheme
Step 1: Description
By selecting from various color schemes, you can determine the colors Windows 95
uses for common system-level items such as window controls. The Control Panel contains
a Display icon that you use to change the color of your Windows 95 installation.
Step 2: Action
TIME SAVER: To display the Display Properties tabbed dialog box quickly right-click over the wallpaper and select Properties.
Figure 8.11.
Change system colors using the Appearance dialog box.
TIME SAVER: There are some color schemes that include the additional benefit of large text sizes. As Figure 8.12 illustrates, you can select a color scheme that makes window text easier to see by enlarging the character size of the Windows 95 characters when they appear in dialog boxes and title bars.
Figure 8.12.
You can change not only system colors but also common Windows 95 character
sizes.
Step 3: Review
The Control Panel contains a display icon that enables you to change the color scheme
of your Windows 95 installation. Once you change the colors and, optionally, the
font size, all standard Windows 95 displays, such as windows, borders, and title
bars, will reflect the new colors.
TIME SAVER: Although Microsoft Plus! is an add-on program you must purchase separately from Windows 95, Plus! offers several additional color schemes as well as entire desktop themes that let you add personality to your Windows 95 desktop.
As you change your color scheme, feel free to change the Windows 95 display font as well. By default, Windows 95 displays icons and window titles and messages in the MS-DOS Sans Serif font. From the Appearance dialog box, you can select a different font for almost every kind of text Windows 95 displays.
This hour took a brief detour from the style of surrounding hours. In this hour, you caught a glimpse of some tips and desktop-management tools that may help you work inside Windows 95 more effectively. After completing the first part of this book, you already have a good foundation of the tools that are available to you as a Windows 95 user. Now that you've become more comfortable with these aspects of Windows 95, you'll appreciate some of this hour's time-saving tips.
Windows 95 is misleading in one respect: It is extremely easy to use. Both novices and advanced users seem to enjoy Windows 95. It remains simple and free of clutter so beginners don't get confused by having to deal with too many things at once. Windows 95 also contains powerful options and tools so that advanced users can always find a different way of accomplishing tasks that take longer using other operating environments.
In this hour, you learned how to improve your computer's idle time by setting up a screen saver. By password-protecting that screen saver, you can add security to your system so you can safely leave for a few minutes without exiting the program you're working in.
There are many timesaving features inside Windows 95. You now know how to change the computer's time, date, screen colors, and even how to add programs to the Start menu with just the mouse. These timesaving features help both the novice and the advanced user utilize Windows 95 more fully.
burn-in Characters left on older computer monitors begin to burn into the monitor, leaving their outlines even after the monitor's power is turned off.
Energy Star A name applied to monitors that comply with environmental guidelines
that limit the use of continuous power applied to your monitor.
screen saver A program that waits in the background and executes only if you
stop using your computer for a while. The screen saver either blanks your screen
or displays moving text and graphics. Screen savers have, in the past, helped eliminate
burn-in problems.
![]()
![]()
![]()