![]()
![]()
![]()
This hour is for everybody and for nobody! Here's the reason for the paradox: Everybody wants more disk space, and nobody backs up often enough! This hour attempts to help you get more disk space and back up more often.
Windows 95 also contains a backup program that lets you back up your files. By making regular backups, you help protect your files from accidental erasure later. If a disaster occurs, such as a disk drive failure (often called a disk crash), you can restore the backup by copying the files from the backup to a healthy disk drive.
Windows 95 contains the DriveSpace technology that compresses disk space by as much as 30 to 100 percent. Therefore, if you have a 200-megabyte disk drive, you can run DriveSpace, and you will have up to 400 megabytes of space once DriveSpace finishes compressing the drive. DriveSpace compresses both hard disks and floppy disks.
The highlights of this hour include:
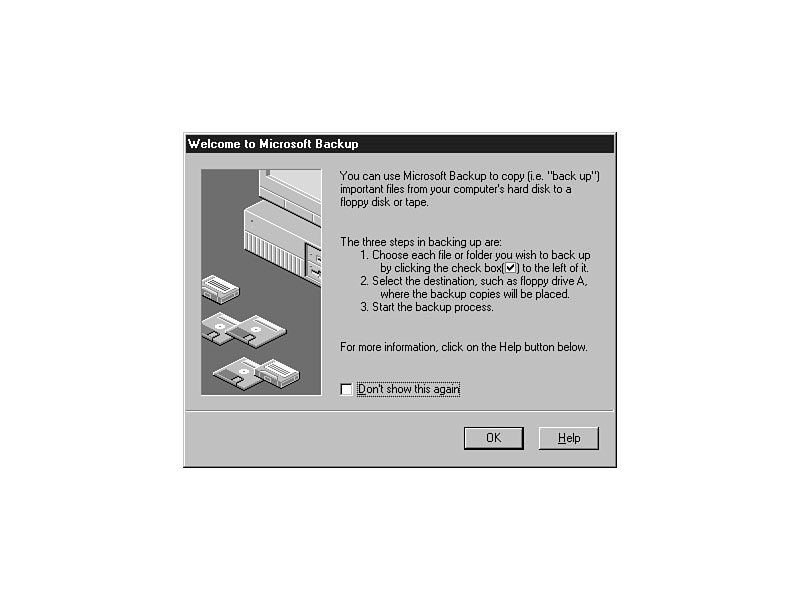
The Windows 95 Backup program is a comprehensive backup program that you can use to save a copy of your disk files. The backup protects you against data loss. If your hard disk breaks down, once you fix or replace it, you will then be able to restore the backup and resume your work. Without the backup, you would have to try to recreate the entire disk drive, which is often impossible, because you will not have a copy of every transaction and document that you've created.
JUST A MINUTE: The Windows 95 Backup program both creates and restores backups.
Many people back up regularly. Most of these people back up regularly because
they once had a disk crash but did not have a backup. (The author is one of those
guilty of losing a disk and all the data before learning to back up!) Please don't
be one to learn the hard way. Learn to use the Windows 95 Backup program and back
up your files regularly.
Windows Minute
Put It in Reverse--Back Up!
The first time you back up you should back up your entire disk drive. Once you back
up the entire disk, you then can make subsequent daily or weekly backups and back
up only the files that you've added or changed since the most recent backup.
The Windows 95 Backup program often can compress files while backing them up so that you can back up large disk drives to other disks or tapes that would not normally be able to hold all the data. If you turn on the compression option, the backup should take less time and make the backups easier to do.
The Windows 95 Backup program also lets you select which files you want to back up so that you can make a special backup of a few selected files. Windows 95 Backup can create a full backup of your entire disk drive or a differential backup (or incremental backup), which backs up only the files that have changed since the most recent backup. Backup also lets you direct restored files to a different drive or directory from where they originated.
TIME SAVER: Take your home computer's backup files with you to work every day and bring your work's backup files home each night. If a terrible disaster happens at home or at work, such as a fire, you will be able to restore your data, because the backups would not be destroyed.
You must decide which medium you want to store the backup on. The Windows 95 Backup program creates backups on the following types of media:
Windows 95 Backup uses the QIC-113 format, which means that Windows 95 Backup can back up and restore onto tapes and other media that have been used by other backup software. Once you make a full backup, especially the very first time, you may also want to run Windows 95 Backup's comparison option to make sure that the backup matches the original data.
JUST A MINUTE: If you use one of the new popular alternatives to hard disks, such as the large capacity removable disks, never fear. The Windows 95 Backup program can easily back up to those disks. During backup, Windows 95 treats the drives as if they are hard disks. You must make sure the disk has a cartridge inside before starting the backup or Windows 95 Backup will not be able to detect the drive.
Not only can the Backup program back up your files to tape, but the Backup's Tools menu option supplies these common tape drive utilities:
Task 19.1: Backing Up Your Disk Drive
Step 1: Description
This task explains how to use the Windows 95 Backup program and its major features.
This task will describe how to back up a hard disk to floppy disks. Although a tape
drive or network drive makes backing up easier than backing up to floppy disks, because
you don't have to keep switching diskettes in and out of the drive, most people today
still back up to floppy disks.
CAUTION: Backing up to diskettes can take a lot of diskettes! Even if you use Windows 95 Backup's compression option, a large hard disk backup consumes many diskettes. If you have a backup tape drive and want to back up to your tape drive (you should do this if you have the hardware) select your tape drive instead of floppy disks as you follow this task.
Step 2: Action
Figure 19.1.
The opening Backup window for backing up a disk drive.
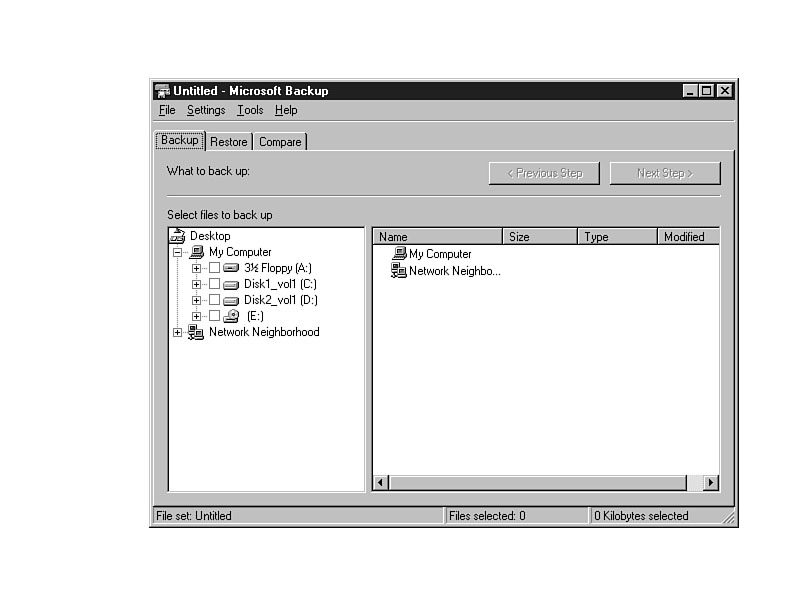
Figure 19.2.
The full system backup file set should be your first backup.
JUST A MINUTE: If you want to follow this task but not take the time right now to back up your entire hard disk to floppy disks, you'll be able to cancel the backup process once it starts.
CAUTION: At this point, you may or may not get a cautionary window telling you either that you do not have a tape drive or that Windows 95 did not detect a tape drive. Backup assumes that you'll want to back up to a tape drive, even though many people have no tape drives. If you have no tape drive, click OK. If you do have one, close the window and exit Backup. Select the Control Panel's Add New Hardware icon to install the tape drive.
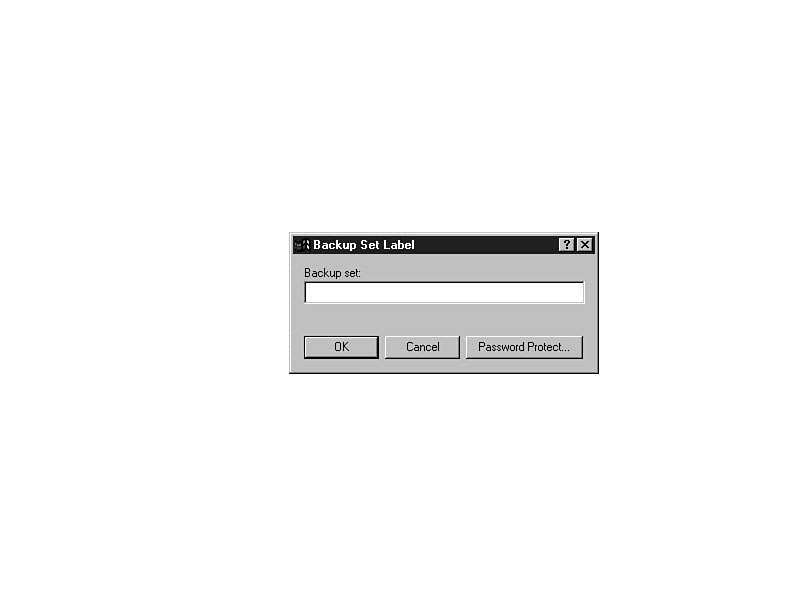
Figure 19.3.
The Backup window where you describe the backup details.
Figure 19.4.
Tell Backup the backup's destination medium.
JUST A MINUTE: When you want to make a differential backup, select Settings | Options and click on the Backup tabbed dialog box. Click the option labeled Incremental back up of selected files that have changed since the last full back up.
CAUTION:: If you back up sensitive data, you may want to add a password to the backup so that others will not get your backup files and restore the files onto their system. Before restoring a password-protected backup set, Windows 95 Backup asks the user for the password and refuses to restore without the proper password. Be sure to store your password in a safe place so you can find it (but nobody else can) if you forget the password.
TIME SAVER: Select the Settings | Options menu and turn on the option Turn on audible prompts in the General tabbed dialog box, so that Backup beeps when you need to insert the next diskette.
Step 3: Review
The Windows 95 Backup program contains a complete set of backup, restore, and comparison
features. The backup file sets make backing up regularly easy to do, because you
can create backup file sets that describe different backup settings and open whatever
backup file set you want to use. (The Windows 95 Backup program supplies a full system
backup set for you to use when you want to back up all hard disk drives.)
TIME SAVER: The Microsoft Windows 95 add-on product named Microsoft Plus! lets you preset a time for backing up your files. You can perform a hands-off backup if you back up to another hard disk or to a network disk drive. (When backing up to floppy disks, you have to be there to change the diskettes.)
The DriveSpace program is easy to run. You only need to run DriveSpace once, because after compressing the disk drive, the disk stays compressed. You also can reverse the DriveSpace compression if you want to, as long as you have enough space on the uncompressed disk drive to hold all your files.
JUST A MINUTE: DriveSpace does no disk defragmentation. Whereas Hour 17, "Fine-Tune with Advanced System Tools," explained how to defragment your disk space, DriveSpace takes the extra step and actually compresses your disk storage to give you almost twice as much room as you had previously.
Windows Minute
Accessing Compressed Data
Some people mistakenly believe that compressing the disk drive with a program such
as DriveSpace slows down disk access. In the majority of cases, a compressed disk
drive is as fast or faster than an uncompressed drive.
Mechanical devices are slower than electronic devices. Memory access is much faster than disk access. When Windows 95 accesses a compressed disk drive, it has to retrieve only half as much physical data; Windows 95 then quickly decompresses that data in fast memory. The overall result is faster disk access.
After you compress a disk drive, Windows 95 and your computer act as if you've got more disk space. The free disk statistics will show the extra drive space, and all programs access the disk as if the disk were originally designed to have the extra space.
JUST A MINUTE: DriveSpace uses the same compression technology previously used by MS-DOS 6. If you've already been working with a DoubleSpace or DriveSpace MS-DOS drive, you do not need to convert the drive to Windows 95 or compress the drive again. Once it is compressed, you can squeeze no additional disk space by trying a subsequent compression.
Task 19.2: Compressing Disks Using DriveSpace
Step 1: Description
This task explains how to compress a disk drive using DriveSpace. The disk will be
a floppy disk. Once you've compressed a floppy disk drive, you will more fully understand
the process and can then compress a hard disk.
CAUTION: You cannot compress a CD-ROM. DriveSpace must be able to write to a device before compressing that device. CD-ROM drives are read-only. (The term ROM means read-only memory.)
When compressing a disk drive, DriveSpace adds a logical disk drive to your system,
called the host drive. DriveSpace will name the new host drive H, or
some other name that falls far down anyone's list of disk drives, so that you'll
be able to determine which drive is a host drive and which drive is from your list
of real disk drives. The host drive will not be compressed, and you will not work
with the host drive. DriveSpace and Windows 95 use the host drive to hold descriptive
information about the compressed drive. About all you really need to know about the
new host drive is that the host is not an actual drive on your system, and Windows
95 uses the host drive to support the DriveSpace compression scheme. All open dialog
boxes you see, as well as the My Computer window, will display the host drive now
that you've compressed.
Step 2: Action
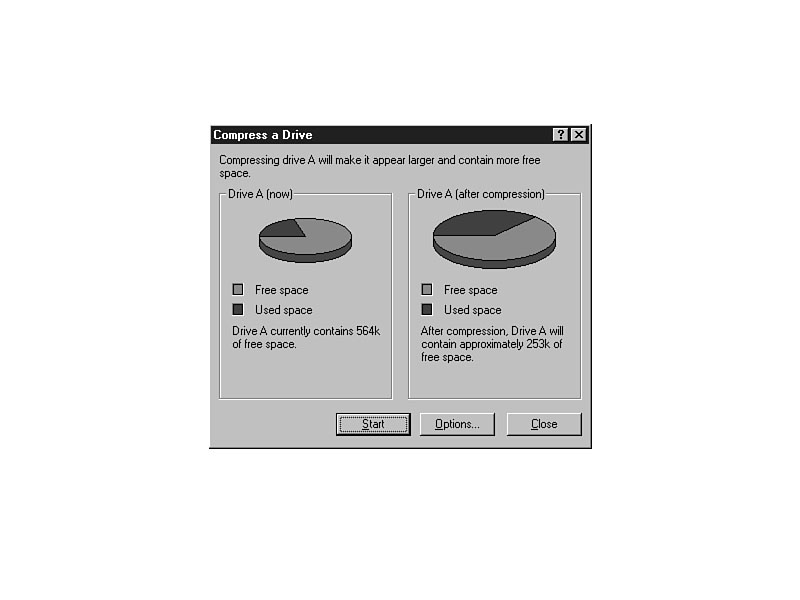
Figure 19.6.
The opening DriveSpace window for compressing a
disk drive.
JUST A MINUTE: If your computer has additional disk drives, your DriveSpace window will display those additional drives in the list of drives.
CAUTION: If, while saving a file from an application during a regular work session, you receive an error message telling you that you are out of disk space, you must remove some files from the disk (using Explorer) before there will be room to save the file. If you then want to compress the disk, you will have to copy or move some of the disk's files to another disk drive to free enough space so that DriveSpace can compress the disk. It is always a good idea, when you think a disk is getting full, to check the amount of free space still available, so that you can compress it before it no longer has enough free space for DriveSpace to work.
Figure 19.7.
The before and after effect of the disk's compression.
JUST A MINUTE: If you want to decompress a compressed drive, you would repeat these steps and choose Drive | Uncompress instead of Drive | Compress.
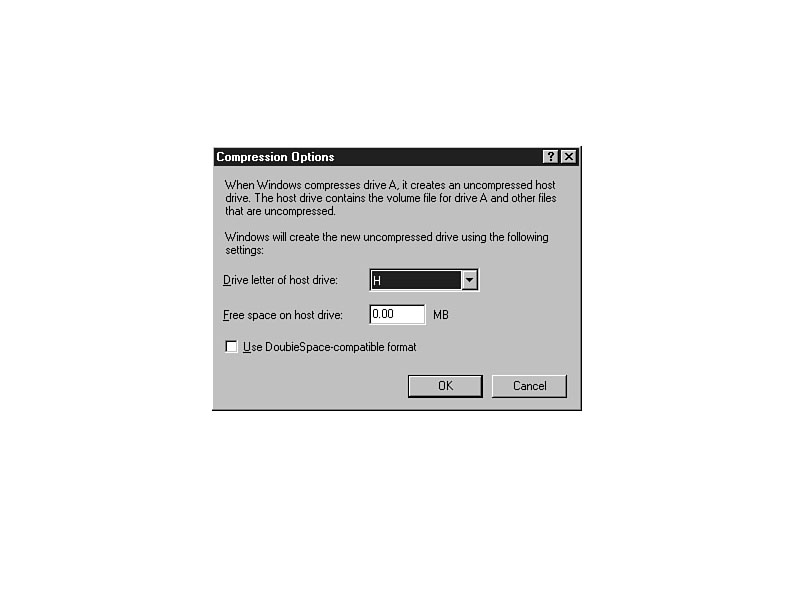
Figure 19.8.
The Compression Options dialog box explains how the compression will operate.
JUST A MINUTE: If you choose to back up before completing the drive's compression, DriveSpace will run the Microsoft Backup program, described in the previous section.
Once the compression begins, DriveSpace checks the diskette for errors and then compresses the diskette. The compression can take a while. After finishing, DriveSpace displays a completion dialog box. Close the dialog box and look at Explorer's status bar to see the increased disk space available on the diskette. Step 3: Review Once you compress a disk drive, Windows 95 recognizes the compressed drive and stores up to 100 percent more data on that drive. There will actually be a second disk added to your drive letters, called the host disk, but you can ignore the host disk, because DriveSpace uses the host disk to store data tables used for accessing the compressed drive.
CAUTION: If you want to format a compressed disk, you must run DriveSpace and select Drive | Format. The Explorer Format command will not format compressed disks. The disk stays compressed during the formatting procedure.
This hour described the DriveSpace compression program and the Windows 95 Backup pro-gram. Both of these programs are new to Windows 95 and take advantage of the Windows 95 32-bit architecture and multitasking capabilities.
The DriveSpace compression program can almost double your disk drive space. By compressing your files and the free file space, you effectively squeeze more data into the same amount of disk space. You can compress both your hard disk drives and floppy disk drives.
The Windows 95 Backup program lets you back up, restore, and compare backups to their original files. The Backup program is the most full-featured backup program that Microsoft has offered. You can create backup file sets that quickly initiate specific backup descriptions. If you purchase a copy of the new Microsoft Plus! program, you can schedule backups so that Windows 95 backs up files while you are away from the computer.
backup file set A description that contains a specific list of files that you want to back up. For example, you may have a backup file set that backs up your accounting data files only, as well as a full backup file set that backs up your entire hard disk.
compression The process of squeezing your disk drive so that almost 100 percent more data fits on a disk.
differential backup A backup of only the files that have changed since the most recent backup. Also called an incremental backup.
disk crash A disk drive failure.
DriveSpace The name of the Windows 95 utility program that condenses the disk space so that more data fits on a disk drive.
full backup A complete backup of your entire disk drive.
full system backup file set A backup file set supplied by Backup that performs a full backup.
host drive A logical new drive that DriveSpace creates to hold compression information.
incremental backup See differential backup.
media The types of storage on which you store and back up data. Examples of media would be a diskette, a tape, and paper.
Microsoft Plus! A Windows 95 add-on product that you can purchase that
can automate the backup process (as long as you back up to tape, a network drive,
or another hard disk) so that you can request a backup at any time of day or night.
ROM Stands for read-only memory and refers to devices or memory that
you can read from, but not write to, delete from, or change.
![]()
![]()
![]()