![]()
![]()
![]()
The My Computer icon opens to a window as you learned in the previous hour. The My Computer window contains information that relates to your computer's hardware and software. You will often open the My Computer window when you add or remove both hardware and software. The My Computer window provides access to many different areas of your computer, as you will see as you progress through this book.
Many computer beginners and advanced users ignore the My Computer window more than they should. The My Computer window, which always appears on your Windows 95 desktop, lets you access every hardware device on your system in a uniform fashion.
In this hour you will use the My Computer window to change the behavior of your mouse and also to modify the screen background that you see. You must look at the desktop often, so changing the graphics behind the desktop can break the monotony that you might otherwise face with a dull Windows 95 desktop screen. People often spend the first few sessions with any new operating environment getting to know the environment and modifying the appearance to suit their own preferences. This hour lets you learn about the My Computer window while you modify your work environment.
The highlights of this hour include:
Your computer system is a mixture of hardware (the system unit, monitor, keyboard, CD-ROM, and so on), firmware (the internal memory), and software (for example, Windows 95, MS-DOS, word processors, spreadsheets, and games). There are several ways to access your computer's hardware and software through different areas of Windows 95. The My Computer window contains one of the most helpful hardware and software management resources available in Windows 95.
As you will see throughout this book, you can manage files, set up hardware, and execute programs from the My Computer window. There are several other places in Windows 95 where you can do those things as well. Windows 3.1 was more limited in its approach, often giving you only a single place from which to access specific computer components and files.
If your My Computer window is still not open from the previous hour, open the My Computer window now by double-clicking the icon. When you double-click the My Computer icon, Windows 95 displays the My Computer window shown in Figure 3.1.
JUST A MINUTE: Your open My Computer window may differ somewhat from Figure 3.1 depending on the configuration of your system. If you do not see an open window, you may have clicked the My Computer icon too slowly. Double-click again until you open the icon's window. If you have trouble double-clicking the icon, you can open the icon by clicking once on it (thus highlighting the window's icon) and pressing Enter.
Figure 3.1.The My Computer window displays the contents of your computer system.
The My Computer icon is always on your Windows 95 desktop when you start Windows 95. Surely that icon must be important or Microsoft would have put it more out of the way. The My Computer icon is important, and its importance will show itself in many ways throughout this book and in your own work as you learn more about Windows 95.
People's needs for the My Computer window will differ greatly, depending on which systems they use to run Windows 95. For example, a network user would probably display the My Computer window more often than a single user working primarily on a spreadsheet program.
The My Computer window works a lot like a mixture between the Windows 3.1 Program Manager and the Control Panel program group. The My Computer window contains a list of all hardware and software on your computer.
To keep things simple, this book uses a PC with a fairly simple system: a floppy disk drive labeled A, two hard disk drives labeled C and D, a CD-ROM labeled E, a modem, and a printer. Almost all of today's Windows 95 users will have these basic hardware devices. You may have more or fewer devices depending on your needs. Whatever configuration your computer uses, the My Computer window works in a uniform manner across all kinds of hardware and software setups.
TIME SAVER: If you have a computer that is Plug-and-Play compatible and you add Plug-and-Play hardware to the computer such as a new internal high-speed modem, Windows 95 should be able to detect that you've installed that new modem. A modem icon will automatically appear inside the My Computer window the next time you start the computer and open the My Computer window. Some devices, such as PC card devices that plug into most laptops and some desktop systems, automatically configure themselves when you insert the cards; they don't require that you first turn off your computer.
Before looking at a sample My Computer window work session, you should understand that there are two ways to view the My Computer window as well as most other Windows 95 windows:
The icon view is the default view that is set when you install Windows 95. The My Computer window figures shown throughout this hour have all shown the icon view format. Newcomers prefer the familiarity that an icon view provides. In other words, later you will learn how to move files from one disk drive to another by dragging a file to the disk icon where you want to put that file instead of typing a disk drive name as computer users of older operating systems have to do.
As you progress, you may prefer to switch to a list view. A list view lists window contents down the screen in a list of items more like a table of contents. Although small icons still appear next to most of the items in a list view of the My Computer window, the icons are extremely small. The list view gives you the ability to see more items at once without the clutter of icons filling the screen.
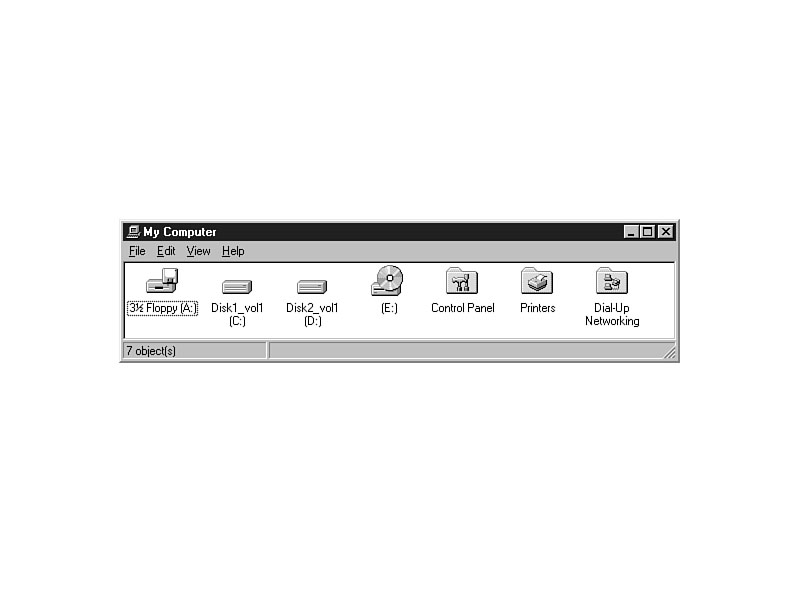
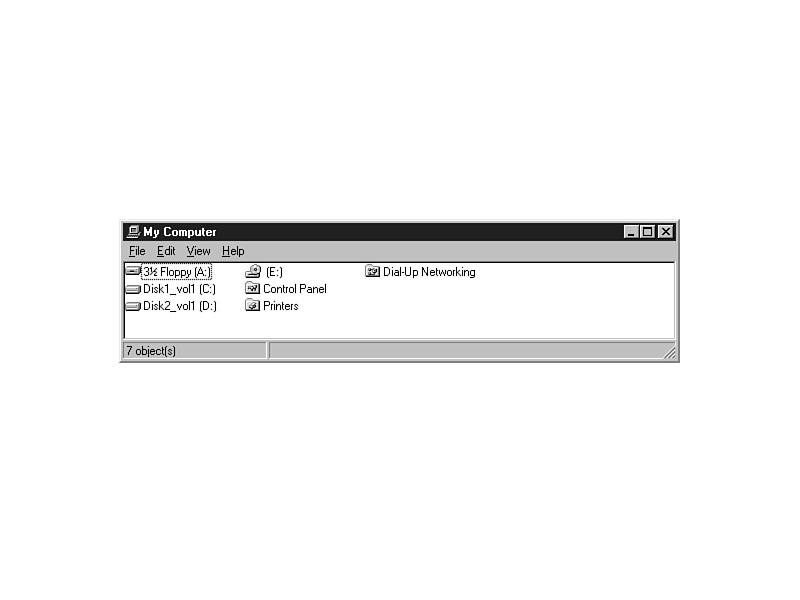
When you first open the My Computer window, the difference between the views is not extremely important because the My Computer window shows a high-level overview of the system. Figure 3.2 shows an icon view of the My Computer window, and Figure 3.3 shows the list view of the same window. Notice that the list view is more difficult to see when only a few items are present in the window. If many more items appeared in the window, however, the list view would provide more information at one time because you would not have to click scroll bars (vertical and sometimes horizontal bars) as often to see all the items listed in the window.
Figure 3.2.The My Computer window shown in icon view.
Figure 3.3.The My Computer window shown in list view.
When you first explore the My Computer window, just look around for a bit. The next task walks you through a sample exploration session of the My Computer window so that you'll quickly get acquainted with some of the window's more useful investigative features.
Step 1: Description
The best way to begin learning about the My Computer window is to work within the
window. Follow the steps in this task to see some of the things that are possible
with My Computer.
Step 2: Action
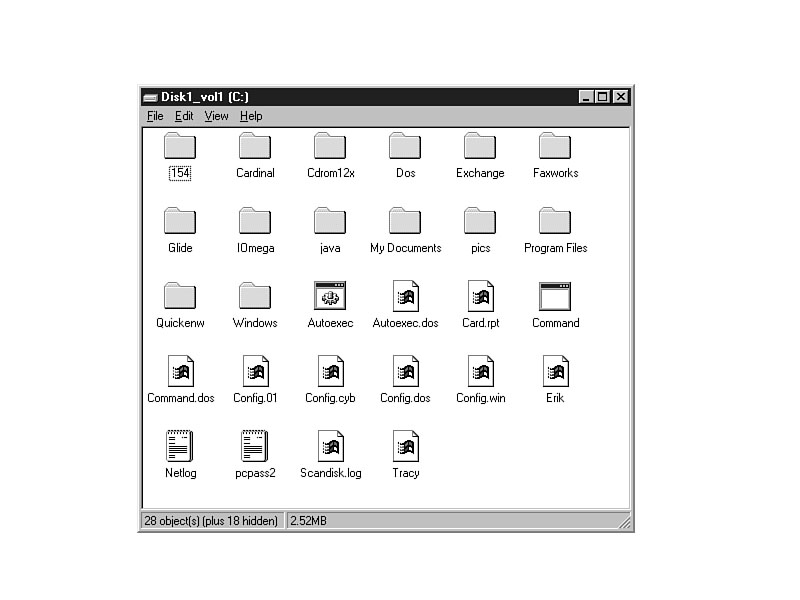
Figure 3.4. Looking at the directories on drive C.
JUST A MINUTE: The folders let you group similar files together so that you can work with the entire group at once instead of having to work with the entire contents of the subdirectory when you want to work with the set of files.
Step 3: Review
The My Computer window displays information about your computer and its contents.
All the computer's hardware and files are located on the disk. As you add more hardware,
you'll see more icons appearing in the My Computer window. The view that you select
determines how much information you can see at one time and how that information
appears with a corresponding icon.
Just A Minute: The Printers folder contains information about the printer or printers attached to your computer. You'll learn how to manage the Printers folder in Hour 15, "Increase Printing Power."
Your computer screen has a limited amount of display area. Within that area, you'll open one or more windows that each have even smaller display areas. Many times, there is simply too much information to display everything in a window at once. When Windows 95 senses that the available screen space will not hold all the contents of the window, Windows 95 attaches scroll bars to the window's borders. Windows 95 may attach a vertical scroll bar, horizontal scroll bar, or both, depending on the direction the window holds the data being displayed.
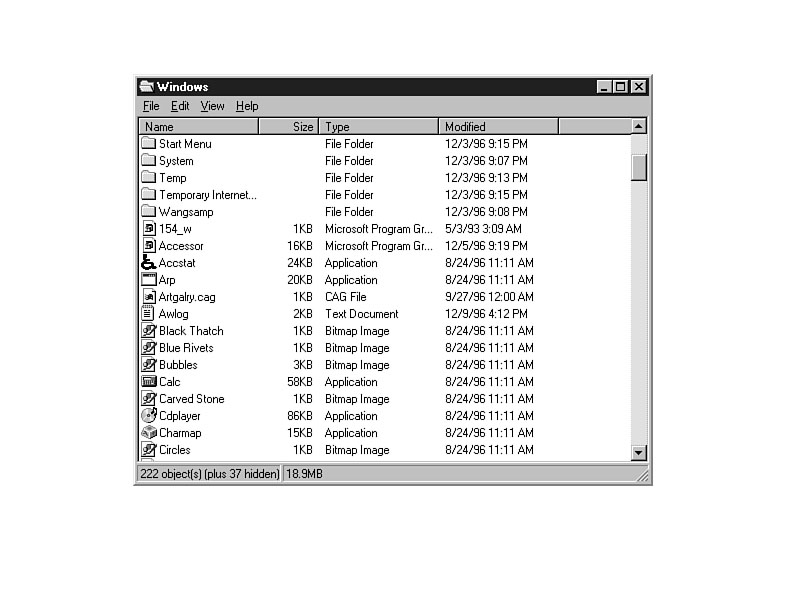
With scroll bars, the window works like a camera panning all around a large scene. You can scroll up and down with a vertical scroll bar, or left and right with a horizontal scroll bar. Figure 3.5 shows a resized My Computer drive C window with one scroll bar. The figure tells the names of the scroll bar parts.
Clicking on either scroll arrow moves ("pans") the window up, down, left, or right by a small amount. If you want to scroll the window farther than the scroll arrows allow, click within the scroll bar shaft for a larger scrolling jump.
The scroll box is sometimes called a "thumb" because you can drag the scroll bar to a specific position anywhere within the scroll shaft and Windows 95 will instantly scroll the window directly to that exact position without your having to scroll incrementally with the scroll arrows. The size of the thumb is large when the majority of the window's contents is within view, and the thumb shrinks if the window is showing only a small portion of the window's contents. Windows 3.1 users are accustomed to a uniform thumb size, but the resizing thumb offers a better gauge and lets you determine more accurately how far down a list you have scrolled.
Figure 3.5. Scroll bars let you look at lots of data.
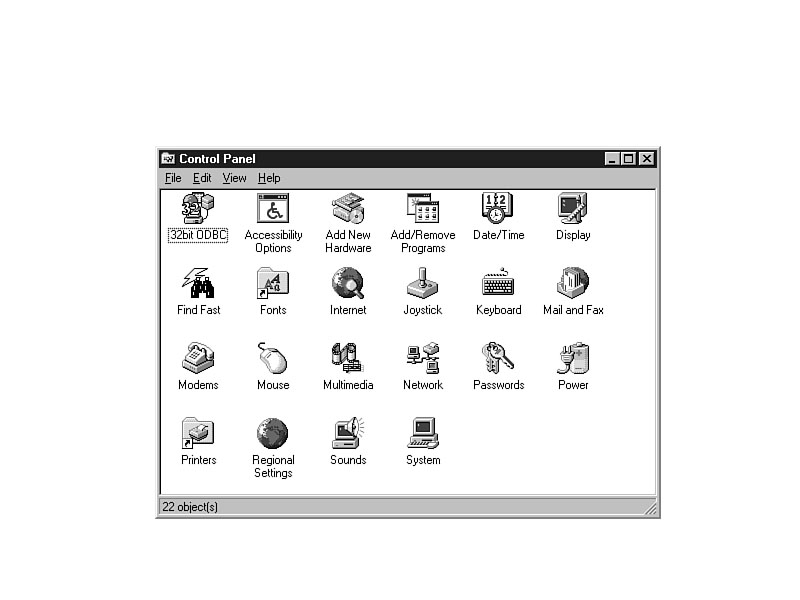
The Control Panel icon lets you adjust and manage the way hardware devices are attached to and respond to your computer. From the My Computer window, double-click the Control Panel icon, and you'll see a window like the one in Figure 3.6. From the Control Panel, you can change or modify system and hardware settings.
Figure 3.6. Modify the system settings from within the Control Panel.
CAUTION: Be very sure that you know what to change before modifying values within the Control Panel. You could change a required setting that might be difficult to reverse later. The Control Panel does not offer any kind of undo command.
As with the previous section, this section is not going to explain the ins and outs of the Control Panel because much of the rest of this book covers the Control Panel and its functions. Nevertheless, the next task demonstrates one safe use of the Control Panel so that the Control Panel will not be foreign to you.
Step 1: Description
One of the safest ways to explore the Control Panel is to modify the behavior of
your mouse. This task changes the mouse cursor's default shape and lets you reverse
the buttons on your mouse.
Step 2: Action
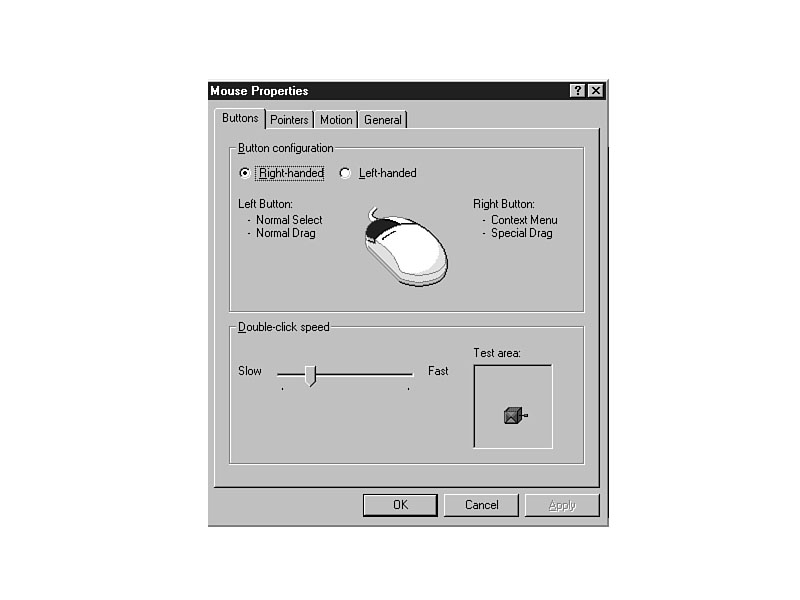
Figure 3.7.You can change the behavior of the mouse.
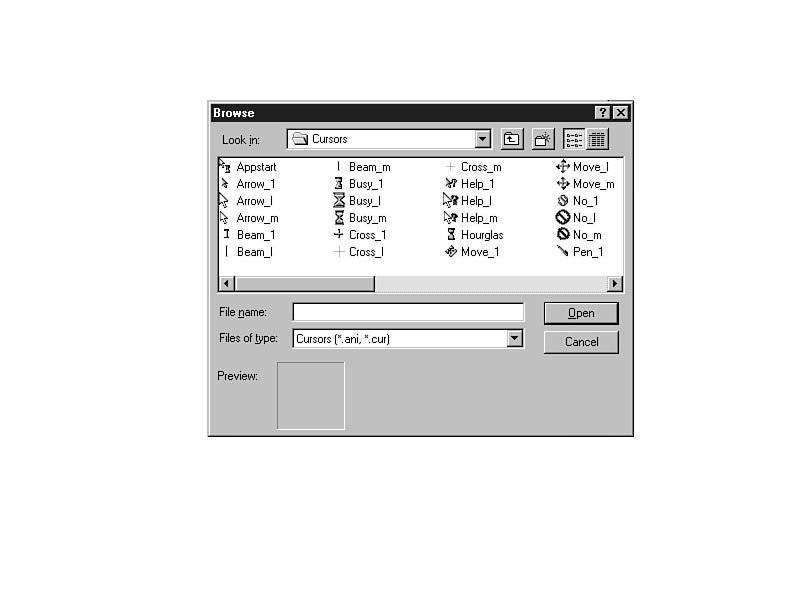
Figure 3.8. Select a mouse cursor shape file.
CAUTION: It's best to stick with the default cursor shape and not keep this change permanent so that others who use your computer will know what the cursor indicates. Even you may forget which shape means what if you were to change the mouse cursors to other shapes.
Step 3: Review
Through the Control Panel located in the My Computer window, you can change various
hardware settings so that Windows 95 interacts with your computer's hardware differently.
This task peeked into the Control Panel by showing you how to reverse the mouse buttons
and change the default mouse shapes.
JUST A MINUTE: Hour 4, "Take Windows 95 to Task," explains more about tabbed dialog boxes such as the Mouse Properties dialog box.
TIME SAVER: Windows 95 supports animated cursors that move when they appear. If you use Microsoft's add-on Windows 95 product called Plus!, or if you've installed one or more of the numerous software products that add animated cursors to your system (such as Office 97), you can select cursors that change shape during their display. Instead of looking at the standard hourglass cursor while you wait on your computer, why not display a hand patiently tapping on the desktop? The animated cursors all reside in files that have the .ANI filename extension. If your cursor name display (see Figure 3.8) does not show filename extensions, click on the cursor names and look at the Preview area of the dialog box to see whether the cursor provides animation.
If you use a right-handed mouse, you probably have had little use for that right mouse button. The same is true for the left mouse button for left-handed users. Beginning with Windows 95, Microsoft added a shortcut feature to the often-unused mouse button: Depending on where you are pointing the mouse, clicking the right mouse button (or left if you are left-handed) brings up a menu of choices of things you can do at that time.
The menu is context-sensitive which means that Windows 95 looks at what you are doing when you click the right mouse button. Depending on the context, Windows 95 displays commands appropriate to that task.
Step 1: Description
This task shows that you don't always need the My Computer window to make changes
to your system. In Hour 1, "What's Windows 95 All About?," you learned
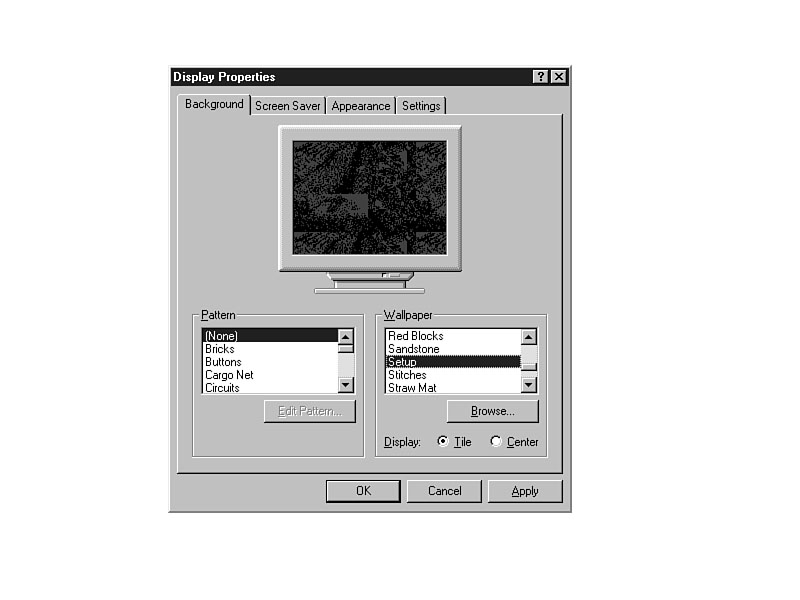
that wallpaper is the name for the background you see on the screen when you start
Windows 95 and work within its windows. You can change that wallpaper to a different
picture or eliminate the wallpaper altogether with a right mouse click.
Step 2: Action
Figure 3.9. A right click displays a wallpaper selection screen.
Step 3: Review
You'll learn other uses of the right mouse button as you progress through this book.
You learned here how to change the wallpaper pattern so that you don't get too bored
by the same old look.
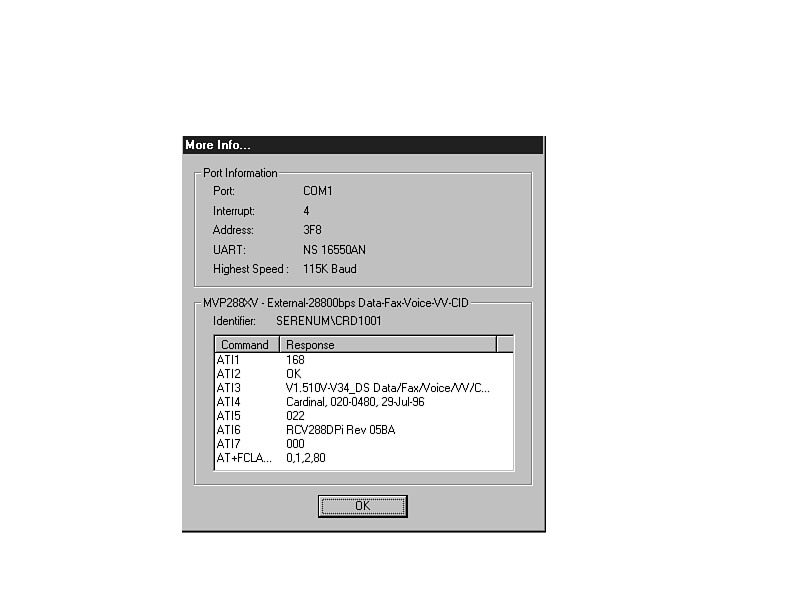
Due to its technical nature, communications can be difficult to understand and troubleshoot. If you are having trouble communicating with another computer, the first place to look is the My Computer's Control Panel folder. Learn how to diagnose your modem problems now so that you will know what to do if you experience the problems that invariably come with modem usage.
Step 1: Description
This task shows you how to let Windows 95 find a potential problem. Windows 95 includes
a modem diagnostic tool that tests your modem connection and lets you know if everything
is fine or if a problem exists.
Step 2: Action
Figure 3.10.The modem is responding properly.
Step 3: Review
The Windows 95 modem test is another one of those nice features that even Windows
95 gurus often forget exists. Although the modem test will not describe detailed
problems that might exist with your modem, you will learn whether Windows 95 recognizes
your modem properly when you experience communications troubles.
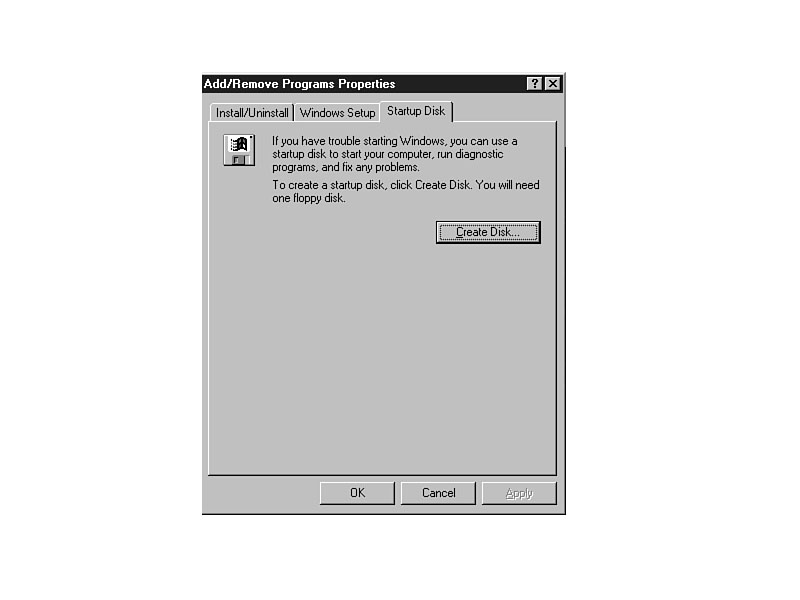
Now that you've familiarized yourself with Windows 95, its environment, and the Control Panel, this would make a great time to ensure against a minor or major disaster. During the course of using Windows 95, you will add hardware and software. Windows 95 makes adding such components relatively easy, but in some cases, problems may occur. Perhaps you receive a bad installation disk, or a hardware conflict arises that freezes up Windows 95.
By making a startup disk, you can safely get your computer started and access your hard disk when you otherwise cannot start your machine. The startup disk is little more than an MS-DOS boot disk, although the disk does contain several MS-DOS and Windows 95 utility programs (such as the Scan Disk utility explained in Hour 17's chapter) that can help you locate disk and memory troubles that can cause boot problems.
CAUTION: If you use a laptop on the road, always carry a startup disk with you! The startup disk will help save you when you do not have Windows 95 installation disks, MS-DOS disks, or utility programs readily available.
Step 1: Description
This task shows you how to create a startup disk. Before beginning this task, locate
a high-density formatted disk. Make sure the disk contains no data that you need,
because the startup process overwrites all data on your disk.
Step 2: Action
Figure 3.11. Create a startup disk for emergencies.
Step 3: Review
Once you create a startup disk, you'll have a disk in case of emergencies. If you
find that you cannot access your hard disk or boot your computer because your system
files are corrupt, you'll be able to regain hard disk access by inserting the startup
disk and rebooting your computer. The startup disk will not be able to cure any problems,
but you will have system access once again so that you may begin tracing the difficulties.
This hour taught you how to use the My Computer window. Don't be dismayed that this hour just skimmed the surface of what's available in the My Computer window because the My Computer icon provides a launching point for many powerful hardware and software interactions that sometimes take quite a while to master. The typical Windows 95 user does not have to know all the details of the My Computer window to use Windows 95 effectively.
animated cursors Cursors that display movement during the cursor's display, such as a cursor showing a picture of a running horse or a playing piano.
context-sensitive The process Windows 95 uses to respond to what you're doing.
Control Panel A folder window within the My Computer window that lets you change your computer's system settings.
desktop The Windows 95 screen and background.
firmware The computer's internal memory, also known as RAM, which stands for Random Access Memory. Firmware memory is volatile, meaning that the contents remain in memory only as long as the PC is turned on. The disk drive is hardware, not firmware, because the disk drive retains its contents after the computer is turned off.
folder A special icon that contains other icons which are displayed when you double-click the folder icon; a grouping of related files stored under the same subdirectory.
scroll bars Windows 95 controlling tools that enable you to view a window's contents more fully.
shortcut key An underlined letter on a menu that you can combine with the Alt key to issue a menu command.
startup disk A disk you create from the Control Panel so that you can start your computer when your hard disk's system files get corrupted due to a hardware or software problem.
![]()
![]()
![]()